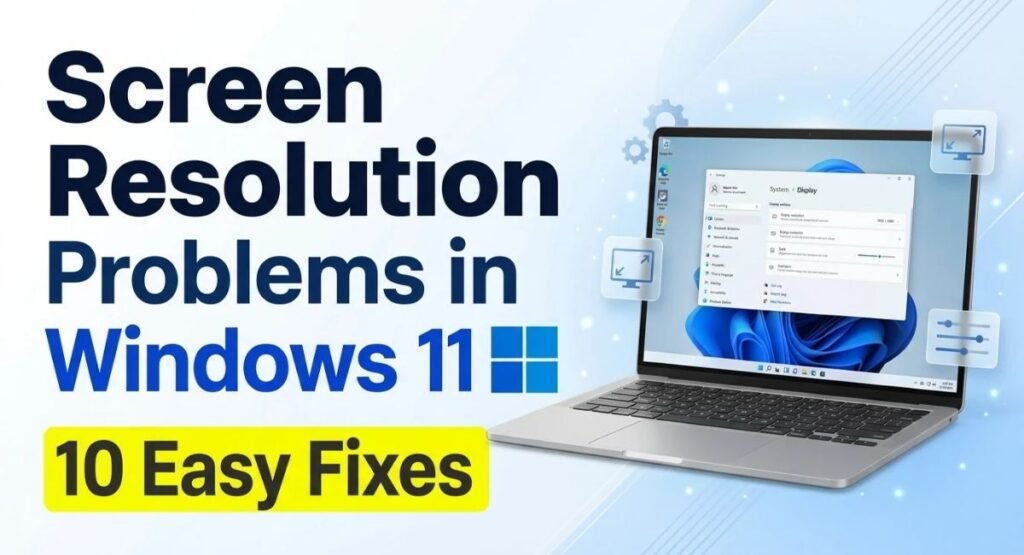
A blurry screen, stretched images, or oversized icons can make your computer frustrating to use. Sometimes, Windows changes the display resolution after a driver update, while other problems occur when the wrong display settings are selected. You might also find that your preferred resolution is missing or that an external monitor looks worse than your laptop screen.
Fortunately, most Screen Resolution Problems in Windows 11 can be fixed without replacing your monitor or installing paid repair software. By checking the recommended resolution, adjusting display scaling, updating graphics drivers, and inspecting monitor connections, you can often restore a clear picture.
What Causes Screen Resolution Problems in Windows 11?
Several issues can affect your screen resolution, even if your display worked correctly before. Identifying the likely cause helps you choose the right fix instead of changing settings unnecessarily.
Common causes include:
- Incorrect display resolution: Windows may be using a resolution that does not match your monitor’s native resolution.
- Outdated or incompatible graphics drivers: A driver problem can hide supported resolutions or affect display detection.
- Incorrect display scaling: Text, icons, and applications may appear too large, too small, or blurry.
- Windows updates: A recent update can sometimes change display behavior or introduce a driver compatibility issue.
- Loose cables or incompatible adapters: HDMI, DisplayPort, USB-C, and docking station connections can limit available display modes.
- Multiple monitor settings: Different displays may support different resolutions, particularly when using Duplicate mode.
- Hardware limitations: An older monitor, graphics adapter, or cable may not support the resolution you want.
Before proceeding, note whether the problem affects your built-in laptop screen, an external monitor, a particular application, or the entire desktop. This can help narrow down the cause.
How to Fix Screen Resolution Problems in Windows 11
Try the following fixes in order. Start with the basic display settings before making driver or system changes.
Select the Recommended Screen Resolution
The first thing to check is whether Windows is using the correct resolution for your monitor. Selecting an unsuitable resolution can make text look blurry, images appear stretched, or content fit poorly on the screen.
To change your display resolution:
- Press Windows + I to open Settings.
- Select System > Display.
- If multiple monitors are connected, select the display you want to adjust.
- Scroll to Scale & layout.
- Open the Display resolution dropdown.
- Select the option marked Recommended.
- If prompted, select Keep changes.

The recommended resolution generally matches your monitor’s native resolution, which provides the sharpest picture. For example, a Full HD monitor typically has a native resolution of 1920×1080.
If the correct resolution is missing, do not immediately force a custom setting. Continue to the driver and connection checks below.
Microsoft’s official screen resolution and layout guide explains how to select the appropriate display and resolution.
Adjust Display Scaling Settings
Sometimes, the resolution is correct, but everything still looks too large, too small, or difficult to read. In this situation, display scaling may be responsible.
Resolution determines the number of pixels used to display an image, while scaling changes the size of text, icons, menus, and other interface elements.
To adjust scaling:
- Open Settings > System > Display.
- Select the correct monitor if you use more than one.
- Find the Scale dropdown under Scale & layout.
- Choose the option marked Recommended.
- Check whether text and applications are easier to read.
- Sign out and back in if an application does not immediately reflect the change.

Windows may offer scaling values such as 100%, 125%, or 150%, depending on your screen and hardware. The available options vary, so use the recommended value as a starting point.
Do not automatically set scaling to 100%. On a high-resolution laptop screen, this can make text and icons uncomfortably small.
If changing scaling does not resolve the problem, restore the recommended setting and continue to the next fix.
Update Your Graphics Driver
Your graphics driver allows Windows to communicate with your graphics hardware. An outdated, corrupted, or incompatible driver can cause missing resolution options, incorrect display detection, or unexpected changes in screen quality.
To update the driver through Device Manager:
- Right-click the Start button.
- Select Device Manager.
- Expand Display adapters.
- Right-click your graphics adapter.
- Select Update driver.
- Choose Search automatically for drivers, if available.
- Follow the instructions and restart your computer if necessary.
You can also check Settings > Windows Update > Advanced options > Optional updates for available driver updates. The exact options depend on your Windows installation.
If Windows cannot find a suitable driver, visit the official support website for your laptop, PC, or graphics card manufacturer. Depending on your hardware, this may be Intel, NVIDIA, AMD, or your computer manufacturer.
Avoid downloading drivers from unfamiliar websites. Installing an incorrect driver can create additional display problems.
For more guidance, see Microsoft’s instructions for updating drivers through Device Manager.
Roll Back or Reinstall the Graphics Driver
If your screen resolution changed immediately after a graphics driver update, the new driver may be incompatible with your hardware or current Windows installation.
In that case, rolling back the driver may be more useful than installing another update.
To roll back the driver:
- Right-click Start and open Device Manager.
- Expand Display adapters.
- Right-click your graphics adapter and select Properties.
- Open the Driver tab.
- Select Roll Back Driver, if available.
- Follow the instructions and restart your PC.
If the rollback option is unavailable, Windows may not have a previous driver available.
If updating or rolling back does not help, you can consider reinstalling the graphics driver:
- Open Device Manager and expand Display adapters.
- Right-click the affected graphics adapter.
- Select Uninstall device.
- Read the confirmation carefully before proceeding.
- Restart your computer so Windows can attempt to reinstall a compatible driver.
Before uninstalling, make sure you know how to obtain the correct replacement driver if Windows does not reinstall it automatically. Your screen may temporarily use Microsoft’s basic display driver, which can offer fewer resolution options.
For detailed guidance, consult Microsoft’s display driver troubleshooting instructions.
Check for Windows Updates and Recent Changes
Windows updates can improve compatibility and deliver driver updates, but a display issue may also begin after a particular update.
If your resolution problem started recently, check Windows Update first.
To check for available updates:
- Press Windows + I.
- Select Windows Update.
- Click Check for updates.
- Install appropriate available updates.
- Restart your computer if requested.
- Return to Display settings and check the resolution again.

If the problem appeared immediately after an update, review Settings > Windows Update > Update history to identify recent changes.
You may consider uninstalling a specific problematic update if the timing strongly suggests it caused the issue and simpler fixes have failed. Go to Update history and look for the uninstall option where available.
Do not remove updates randomly. Uninstalling updates can affect security and stability, and some updates cannot be removed.
Check Your Monitor Cable, Port, and Adapter
If you are using an external monitor, the problem may come from the physical connection rather than Windows settings.
A loose HDMI cable, damaged DisplayPort connection, incompatible USB-C adapter, or docking station with limited display support can prevent Windows from offering the expected resolution.
Try these checks:
- Make sure the monitor is powered on.
- Disconnect the video cable from the computer and monitor.
- Reconnect both ends securely.
- Select the correct input source on the monitor, such as HDMI or DisplayPort.
- Test another compatible cable or port if available.
- If you use a docking station or adapter, connect the monitor directly to the computer when possible.
- Restart the monitor and computer.

Some cables, adapters, and docking stations support lower maximum resolutions or refresh rates than others. Check the specifications of the computer, cable, adapter, and monitor before assuming that a higher resolution is supported.
If the laptop’s built-in display works normally but the external monitor does not, focus on the external display, its cable, its input source, and the adapter.
Check Multiple Monitor Settings
Using two or more displays can introduce resolution problems, especially when the monitors have different native resolutions.
For example, a laptop with a high-resolution screen may be connected to an older 1080p monitor. Each display needs to be configured according to its supported capabilities.
To check the settings:
- Open Settings > System > Display.
- Look at the display arrangement section.
- Select the monitor you want to adjust.
- Check its Display resolution dropdown.
- Select the recommended resolution for that monitor.
- Under Multiple displays, choose the mode that suits your setup.

The two main display modes work differently:
- Duplicate these displays: Shows the same content on both screens. Available display modes may be limited by the capabilities of the connected displays.
- Extend these displays: Creates a larger desktop across both screens, allowing you to configure each display independently where supported.
If Windows does not detect your second monitor, select Detect where available. Also check the monitor’s power, cable, and input source.
Check Your Monitor’s Supported Resolution
If Windows is stuck at 1920×1080 or another resolution, first determine whether that setting is actually incorrect.
A resolution of 1920×1080 is Full HD. It is the native resolution of many monitors, but not all displays support higher resolutions.
For example, a monitor with a native resolution of 2560×1440 or 3840×2160 should normally offer its supported modes when the graphics hardware, driver, and connection are configured correctly.
To investigate:
- Open Settings > System > Display.
- Select the monitor you want to configure.
- Review the available Display resolution options.
- Check the monitor’s manual or official specifications.
- Confirm that the graphics adapter supports the desired resolution.
- Check the cable, port, adapter, or docking station specifications.
- Update the graphics driver if the correct resolution is missing.
If your monitor’s native resolution is 1920×1080, there may be nothing wrong with the setting.
Can You Get 1920×1080 Resolution on a 1366×768 Screen?
A panel with a native resolution of 1366×768 has fewer physical pixels than a Full HD display. Selecting a 1920×1080 output mode does not turn that panel into a true native 1080p screen.
Some graphics hardware or software can scale an image, but the physical panel still has its original pixel count. For genuine Full HD detail, you need a display with a native resolution of 1920×1080 or higher.
Do not force unsupported resolution settings. An incompatible display mode can result in a blank screen or an out-of-range message.
Check Your Graphics Control Panel
If Windows Display settings do not show the resolution you need, your graphics manufacturer’s software may provide additional display options.
The available controls depend on your graphics hardware and installed software.
For NVIDIA graphics:
- Right-click the desktop and open NVIDIA Control Panel, if installed.
- Select Display > Change resolution.
- Choose the correct monitor.
- Review the available resolution options.
- Select a supported resolution and apply it.
For AMD graphics:
- Open AMD Software: Adrenalin Edition, if installed.
- Look for the available display-related controls.
- Review the supported display modes for your monitor.
For Intel graphics:
- Open the Intel graphics application installed on your PC.
- Find the display configuration section.
- Review the available resolution and scaling options.
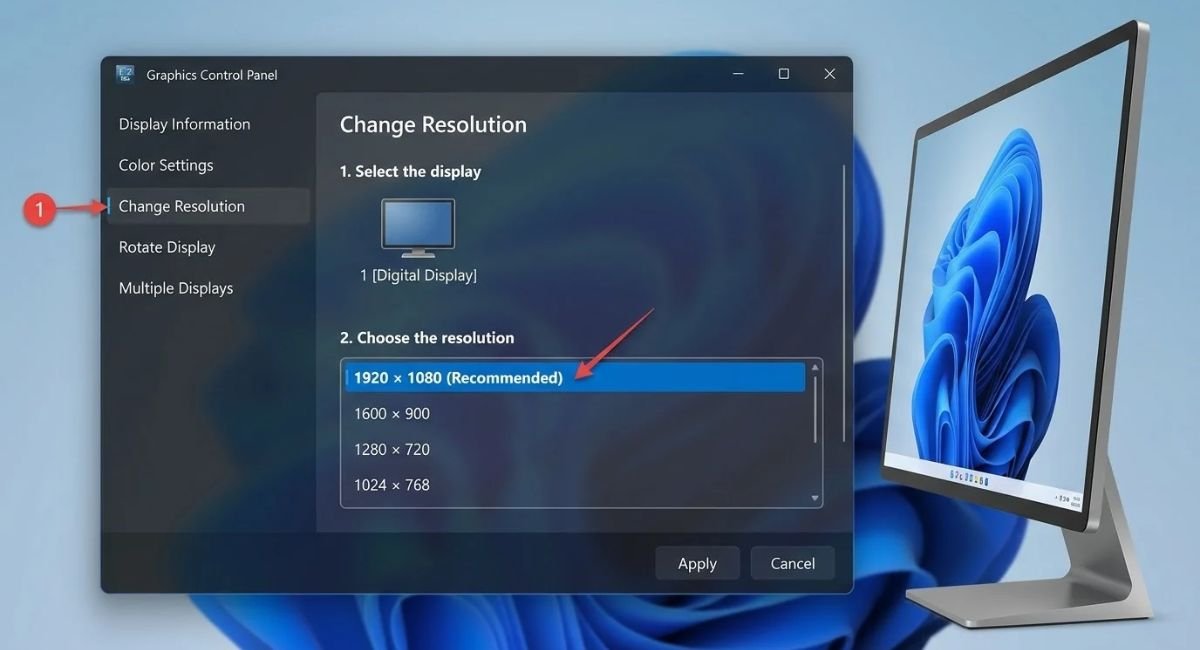
Use only display modes supported by your monitor and graphics hardware. If the desired option is unavailable, check the manufacturer’s official documentation rather than forcing a custom resolution.
Troubleshoot Persistent Display and Hardware Problems
If the previous fixes have not helped, investigate whether Windows is detecting your display and graphics hardware correctly.
Start with these checks:
- Open Device Manager.
- Expand Display adapters.
- Look for warning symbols beside your graphics adapter.
- Check the adapter’s Properties for any reported device errors.
- Confirm that the correct graphics driver is installed.
- Test another compatible cable, port, or monitor if possible.
If your display resolution is still limited, check whether the monitor is being detected correctly. A docking station or adapter may also be restricting the available modes.
For an external monitor, test it with another compatible computer if one is available. You can also connect a known-working monitor to your PC.
These tests help narrow down the problem:
- If another cable fixes the issue, the original cable may be faulty or incompatible.
- If another monitor works correctly, the original monitor or its compatibility settings may be responsible.
- If multiple monitors show the same problem, investigate the graphics driver, computer, and display output.
- If the display fails across multiple compatible devices and connections, the monitor may need professional inspection.
Avoid buying replacement hardware before identifying the likely cause. If the display shows persistent artifacts, repeatedly loses its signal, or remains unusable after basic troubleshooting, contact the computer or monitor manufacturer’s support team.
How to Fix Screen Resolution Out of Range Errors
An out-of-range message usually means the monitor is receiving a resolution or refresh rate it cannot display.
To resolve it:
- Restart the computer and check whether the message disappears.
- If the screen remains unusable, connect another compatible monitor if available.
- Open Windows Display settings.
- Select the affected monitor.
- Choose a resolution marked Recommended.
- Open Settings > System > Display > Advanced display.
- Select a refresh rate supported by the monitor.
- Apply the settings and test the original display again.
If you cannot access the Windows desktop, a compatible replacement display may help you correct the settings. Depending on the cause, Windows Recovery Environment or Safe Mode may also be useful for troubleshooting display driver problems.
Do not choose random resolution and refresh-rate combinations. Check the monitor’s specifications first.
How to Fix Low Resolution in Games and Applications
Sometimes, Windows displays the desktop correctly, but a game or application looks blurry or stretched.
Games can use a separate rendering resolution from the Windows desktop. To troubleshoot a game:
- Open its graphics or video settings.
- Check the resolution and display mode.
- Select a supported resolution that matches your monitor.
- Review any in-game scaling or upscaling options.
- Restart the game and check the result.
If only one application looks blurry, Windows scaling compatibility may be involved. Older applications may not handle high-DPI displays correctly.
Check whether the application has an update available. You can also review its compatibility settings, but change one option at a time and test the result.
Remote Desktop sessions may have separate resolution controls, so a blurry remote session does not necessarily mean your physical monitor is configured incorrectly.
Why Can’t I Change the Screen Resolution in Windows 11?
If the Display resolution dropdown is missing, disabled, or offers only a few options, Windows may not be detecting the monitor or graphics hardware correctly.
Try the following:
- Confirm that you selected the correct monitor in Display settings.
- Check Device Manager for graphics adapter warnings.
- Update the graphics driver using Windows Update or the manufacturer’s official website.
- Check the cable, adapter, docking station, and monitor specifications.
- Restart the computer after installing a compatible driver.
- Review the graphics manufacturer’s control panel for additional supported options.
If the resolution changed after a driver update, try rolling back the driver if the option is available.
A missing resolution does not automatically mean the monitor is damaged. Driver and connection problems can produce similar symptoms.
Frequently Asked Questions
1. Why Did My Screen Resolution Suddenly Change in Windows 11?
A graphics driver update, Windows update, new monitor connection, or changed display setting can cause the resolution to change. Open Settings > System > Display and select the recommended resolution. If the correct option is missing, check the graphics driver and monitor connection.
2. How Do I Restore My Normal Screen Resolution in Windows 11?
Open Settings > System > Display and select the resolution marked Recommended. If the screen still looks wrong, check scaling, cables, and graphics drivers. For an external monitor, make sure you selected the correct display before changing its settings.
3. Why Is My Screen Resolution Stuck at 1920×1080?
Your monitor may have a native resolution of 1920×1080, in which case the setting is normal. If your monitor supports a higher resolution, check the graphics driver, monitor specifications, cable, adapter, and docking station.
4. Can an Outdated Graphics Driver Cause a Blurry Screen?
Yes. An outdated or incompatible graphics driver can limit resolution choices or prevent Windows from detecting the display correctly. Updating, rolling back, or reinstalling the appropriate driver may restore the available display modes.
5. How Do I Fix a Stretched Display After Connecting a Second Monitor?
Open Settings > System > Display, select the external monitor, and choose its recommended resolution. Check the monitor’s aspect ratio and connection. If the issue continues, update the graphics driver and test another compatible cable or port.
6. Why Is 1920×1080 Resolution Not Available on My PC?
Your monitor, graphics driver, cable, adapter, or docking station may not support that display mode. Check the manufacturer’s specifications and install a compatible graphics driver. If your screen has a native resolution of 1366×768, it cannot provide true native 1080p detail.
7. How Do I Fix a Blurry Screen Without Changing the Resolution?
First, check the Scale setting under Settings > System > Display. Choose the recommended scaling option. If only one application looks blurry, update the application and review its compatibility settings. If the entire screen is blurry, check the graphics driver and display connection.
Conclusion
Most Screen Resolution Problems in Windows 11 can be traced to incorrect display settings, graphics driver issues, connection limitations, or monitor compatibility.
Start by selecting the recommended resolution and adjusting scaling if necessary. Then check the graphics driver, monitor cable, and multiple-display configuration. If the correct resolution remains unavailable, verify your monitor’s native resolution and the capabilities of your graphics hardware and connection.
Work through one change at a time so you can identify what fixes the problem. If the display still fails after these checks, test another compatible monitor or contact the manufacturer’s support team before replacing hardware unnecessarily.